IBM DataPower Operations Dashboard v1.0.8.5
A newer version of this product documentation is available.
You are viewing an older version. View latest at https://ibm.biz/dpod-docs.
Appliance Installation
- Copy Page Tree
- shachar greenberg (Unlicensed)
DPOD acts like a virtual appliance but comes packaged as an ISO file, in order to support installation on both physical and virtual installation scenarios.
When Installing DPOD from an ISO file, The first step is to install the Appliance. This means installation and configuration of the OS that is pre-loaded on the ISO (CentOS).
Completing the steps below will create a DPOD-ready appliance to install DPOD's software on.
You MUST NOT add or install any packages / RPMs at DPOD's installation time (or after installation completes) unless instructed by support.
You MUST NOT update the CentOS version or any other component within DPOD using external repositories (for example, do not use yum update).
The only supported way to upgrade the platform and/or components is by applying a product Fix Pack.
OS Installation
- Set DPOD ISO file on your virtual/physical server's DVD.
- Power on the virtual/physical server.
On the OS launch screen, choose “Install Appliance” to start the automatic OS installation for Standard Edition.
: c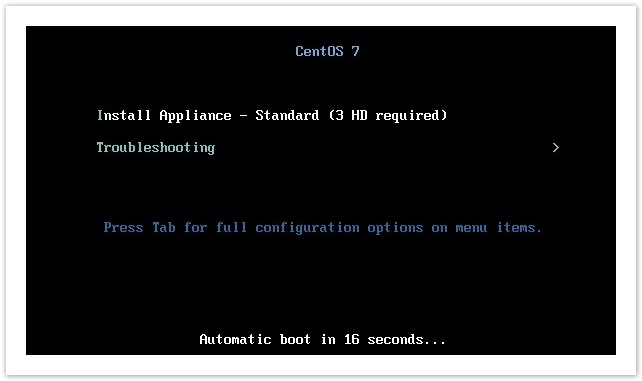
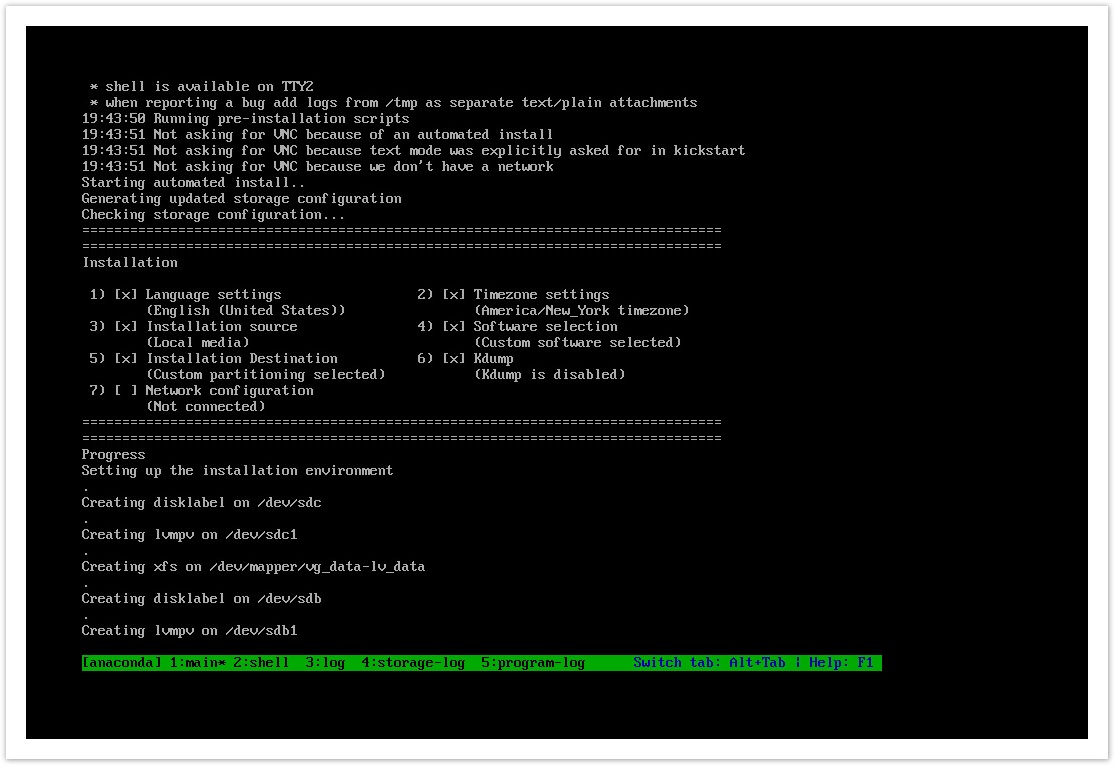
The required packages will now be installed. Wait for the installation to complete before proceeding (this should take a few minutes).
Developer Edition should have different launch screen stating this is a Developer Edition. The rest of the steps are the same
Network Configuration
When the OS installation completes, you will be presented with the Network Configuration screen, used to provide DPOD with the network information it requires.
- Enter DPOD's host name, e.g. dpod25min (you may add the host name to your organization's DNS).
- Enter the IPv4 address, e.g. 192.168.65.170
- Enter the network netmask, e.g. 255.255.255.0
- Enter the default gateway: e.g. 192.168.65.2
- Enter primary and secondary DNS server IP addresses (not mandatory)
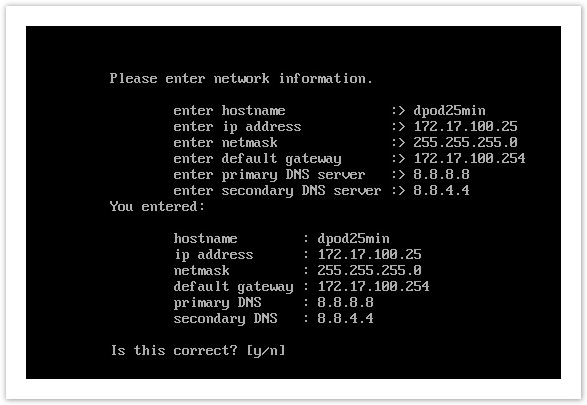
When the network data entry process is complete, DPOD echoes it back on the screen for verification and displays an 'Is this correct [y/n]' prompt.
Enter “y” to confirm network details as entered or “n” to re-enter the information.
Setting Admin Passwords
The last screen lets you set passwords for the admin users.
- Change DPOD's OS administrative user (productadm) password:

- Change root user password .

Installation Finalization
When you've completed all the steps above, before you press ENTER or Return you should disable/ Eject your DVD of DPOD.
In VMWare you can do it by edit the VM Host setting and disable the following
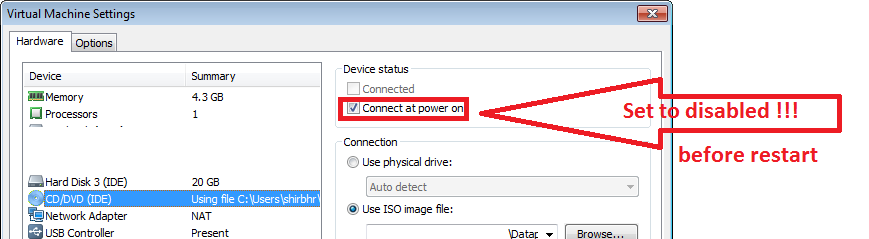
Please press ENTER or Return and the server will restart automatically.

After the server was restarted - don't forget to remove the DPOD installation disc from the DVD drive.
Next: Run the Software Deployment